Calem Blogs
How to Merge Calem Instances into a Central Service
Calem Cloud Services provide flexible choices for organizations to manage business units. An organization can manage business units in a central Calem Cloud Service, or use multiple cloud services each for a business unit.
This blog discusses the process of merging multiple Calem Cloud Services into a Central Calem Cloud Service. You may reference this blog for more discussion of pros and cons in your choice of a central, or multiple services when you choose Calem Enterprise Lightning.
A central Calem Service comes with the following benefits.
- Supervisors can have access to all warehouses across business units. It enables cost effective sharing of spare parts.
- Managers can view centralized dashboards to have real time understanding of the state of the maintenance operations across business units.
- Integration with other services can be better managed by a central service than multiple Calem cloud services.
- Processes can be better enforced with a central service including data access control, screen flows, and common naming conventions.
Here is the process diagram to merge multiple Calem services into a central service.
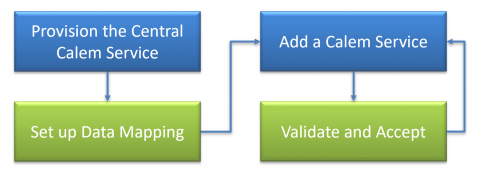
1. Provision a Central Service
The first step is to provision a central service. The following factors are considered in provisioning the central service. Your Calem support team will work with you to drive the provisioning of the central service.
- The number of login users for the central service. It can be derived from the number of users in the current Calem services to be merged into the central service.
- The sizing of the service including the sizing of compute and database resources. It can be derived from the current Calem services to be merged.
2. Data Mapping in Central Service
The data mapping is needed to merge data from different services into the central service.
2.1 Metadata
The Calem metadata includes custom fields, dropdowns, class attributes, screen layouts, and language texts. The amount of metadata to be merged can be configured - see Calem Enterprise Admin Guide for more information.
| Metadata |
| Custom Fields |
| Dropdowns |
| My Dropdowns |
| Class Attributes |
| Messages |
| Defaults (not includes in merge) |
| Help customization (not included in merge) |
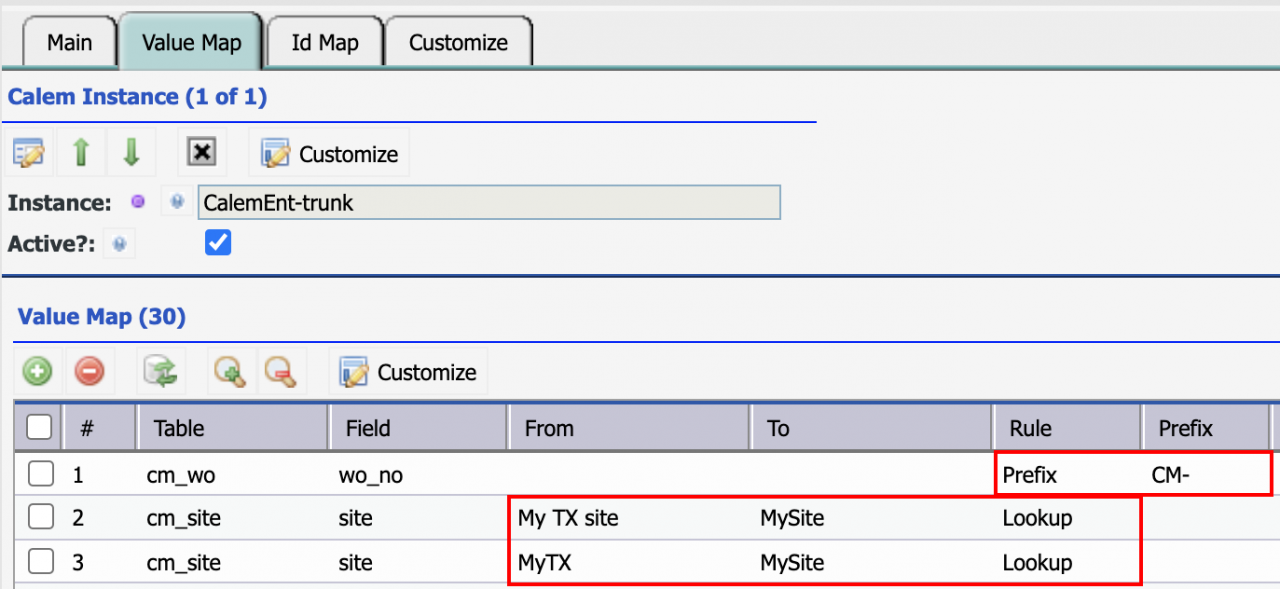
2.2 Data Mapping
- Menu path: Integration | Open | Instances to Merge. Use this menu to define Calem instances to be merged into the central service.
- For each instance, define rules of merging;
- Define a lookup rule to convert an object value from a Calem service into a new object value in the central service. For instance, more than one site will be merged into a new site in the central service.
- Define a prefix rule for object names. For instance, a prefix is added to a work order number for each Calem service to be merged. This is necessary since same work order numbers may be used in different Calem services.
- See Admin Guide for rules recommended.
3. Add a Calem Service
Adding or merging a Calem service to the central service is an incremental process. It is recommended to add a Calem service, validate and accept the results before moving on to a next Calem service. Here are the processes:
- A. Back up your Central Calem Service
- B. Export the service to be imported.
- C. Merge into Calem Central service
- D. Validate the merge results
- E. If there are changes to merge rules (data mapping), restore the central service, add/update data mapping. Go to Step C to merge again.
3.1. Export a Calem Service
Go to the Calem service to be merged, export all data.
- Menu path: Integration | Open | Instance Export
- Select "All Site" to export all the data of a Calem Service.
- The export is stored in Calem_Home/server/upload_files/instance/export/
- Create an archive of the export directory/files.
- Transfer the archive to the Central Calem service in Calem_Home/server/upload_files/instance/import/

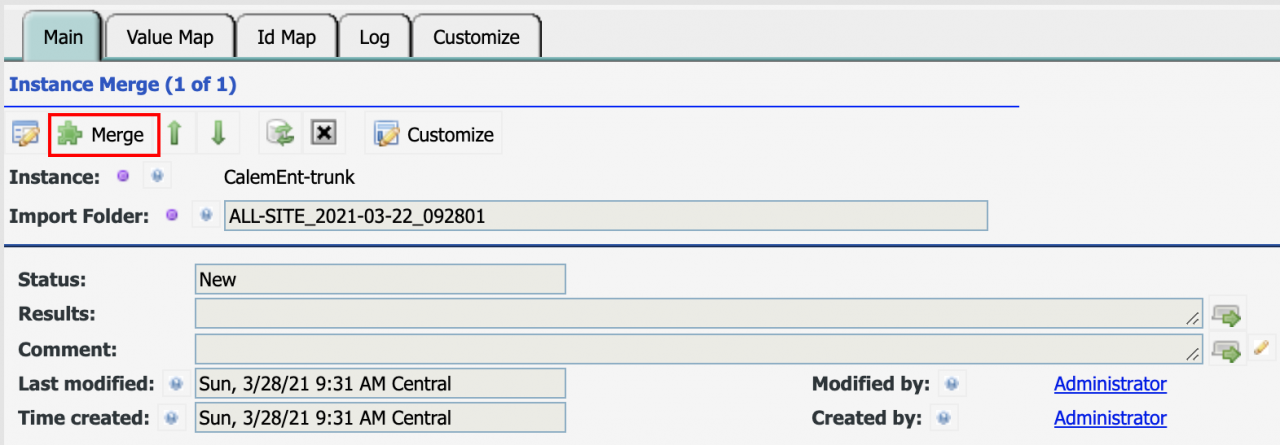
3.2. Merge a Calem Service
- Export the database of the Central Service
- Back up the Calem_Home/custom/ directory
- Menu path: Integration | Open | Instance Merge to Central Service
- Select the instance to be merged
- Select the directory of export to be merged
- Click "Merge" button to launch the merge process
- It takes quite a while (tens of minutes) to perform a merge depending on your instance data volumes.
- When a merge is done, the "Id Map" tab shows that the record Ids being changed; "Log" tab shows the previous merge performed for this instance.
4. Validate and Accept
It is important to validate the data merged into the central service.
- Calem displays the merging results for each table.
- Inserted: records inserted
- Updated: records updated
- Ignored: records are ignored
- NewId: records have new Ids
- User the results to perform your validation and acceptance.
- You may copy the results from the screen and paste into an excel worksheet.
- Use the worksheet as a checklist to perform your validation.
- When all is accepted you may plan for the merging of another Calem service into the central Calem if applicable.

Additional Resources
- Multiple Cloud Services for Business Units
- Calem Remote Deployment Tool
- Enterprise Architecture: Single-org versus Multi-org Strategy
- Calem Enterprise REST API Guide (customer account required)
- User Guide and Admin Guide (customer account required)
- Calem Enterprise Training Site
- Calem Enterprise Blogs
- Calem Enterprise demo
About the author

By accepting you will be accessing a service provided by a third-party external to https://eam.calemeam.com/