Calem Blogs
Data Upload Part 1: Inventory Setup
This blog series demonstrate the data setup through uploading data from excel templates. Here are some background about excel templates and data upload:
- An excel data template is generated for each table in Calem. Customers can download the archive of all the templates at https://support.calemeam.com/view.php?id=4046. A customer account is required to download the templates.
- The Data Upload Guide has information for some tables that should not be uploaded including transaction tables that are generated in Calem. Customers can reference the Data Upload Guide at https://support.calemeam.com/view.php?id=3983. A customer account is required to download the Guide.
- The excel templates can be used to create new data or update existing data. So, you can use the same excel file to create data and make changes by uploading the file more than once.
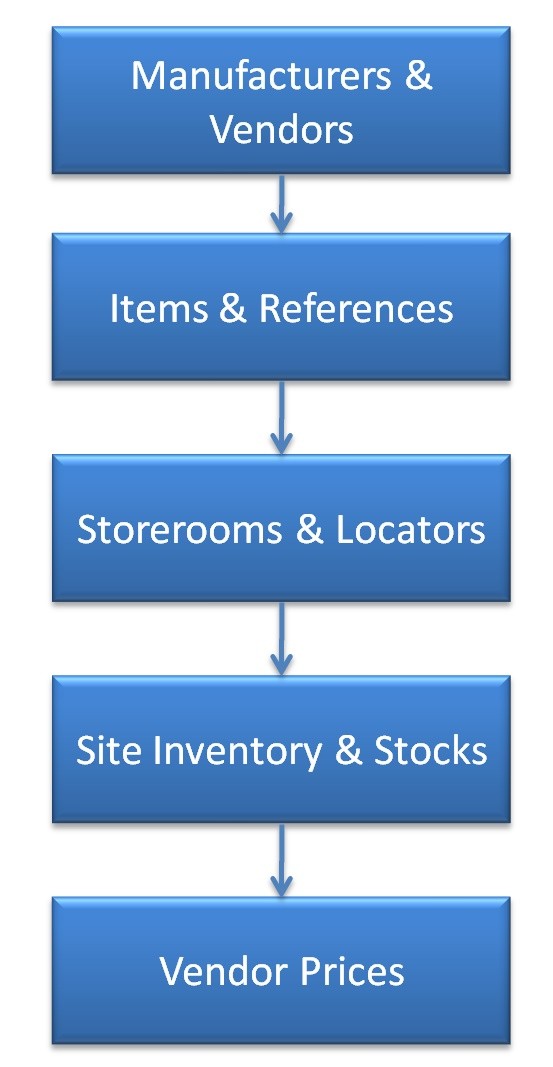
This is the first part of the data upload tutorial. Inventory setup is covered. This blog serves as the detailed walk-through for the steps defined in Calem Setup 3: Inventory Setup.
Step 1. Upload Manufacturer and Vendors
Manufacturers and Vendors are companies (table name: cm_company) in Calem. They have the following attributes:
- Class (class_id): Vendor
- Vendor flag (is_vendor): 1
- Manufacturer flag (is_manufacturer): 1
If both vendor and manufacturer flags are set, the company is both a vendor and a manufacturer. A default manufacturer site or vendor site of the same name as the company is created.
Two excel files are included here:
- The sample excel template: cm_company.VendorManufacturers.xls.
- The generated excel template: cm_company.xls.
- The sample excel includes some fields of the company templates.
- The generated template includes all the standard fields in Calem.
Here are the processes to use sample and generated templates:
- Start with the sample template. Populate the fields for each manufacturer and vendor.
- If there are fields you need to add that are not in the sample template, search the fields in the generated template. If found, copy them to the sample template and populate the fields. Otherwise, contact your Calem support for help.
- If you have added custom fields, just add the custom fields to the sample templates and populate the custom fields.
Step 2. Upload Items and References
Two excel templates are included for items. Start with the sample template, and use the generated template when needed.
- The sample excel template for global items: cm_in.Global_Items.xls.
- The generated excel template for global items: cm_in.xls.
Use item reference template to define manufacturer and/or vendor numbers for the item number you established.
- The sample excel template for item references: cm_in_ref.sample.xls. The generated excel template has the same fields (so, it is not included).
- The excel template to upload equivalent items: cm_in_eq.Equivalents.xls.
Step 3. Upload Storerooms and Locators
Storerooms are the places where you store parts. Locators are the codes of aisle, shelf and bin inside a storeroom. Upload storerooms first, then locators.
- The sample excel template for storerooms: cm_in_store.Inventory_Store_Warehouse.xls
- The sample excel template for locators: cm_in_locator.Store_Locators.xls
Step 4. Upload Site Inventory
Site inventory defines the items tracked in sites. Upload site inventory first. Two excel templates are included:
- The sample excel template for site inventory: cm_in_site.Site_Inventory.xls.
- The generated excel template for site inventory: cm_in_site.xls
Step 5. Populate Stock
There are two options to populate stock: a) Physical Count transaction; b) receive transaction.
5.1 Physical Count Transaction
Physical count transactions may be used to build out stock with item quantity and the locators where the parts are physically stored. If you are uploading serialized inventory, use the serialized template below. Serialized inventory are for items that are tracked by their serial numbers. Unless required by your business, use the first template (not the serialized template).
- Menu path: Inventory module | Transactions | Import Physical Count
- A sample excel template for physical count transaction upload: Inventory_Physical_Count.001.xls
- A sample excel template for serialized inventory physical count upload: Physical_Count.001.SerializedParts.xls.
5.2 Receiving Transaction
Receiving transactions may be used to build out stock with item quantity, unit price, and the locators where the parts are physically stored. There are limitation to receiving transaction uploading: a) Serialized inventory receiving is not supported; b) Receiving to other objects (work order, asset and cost center) are not supported.
- Menu path: Inventory module | Transactions | Import Receiving to Storeroom
- A sample excel template for receiving transaction upload: ReceivingInventory.001.xls
Step 6. Unit Price
Unit price can be imported by an excel file. The unit price upload does not support store-based pricing. Unit price uploading is not necessary if receiving transactions are used to populate the stock.
Here is a sample: Inventory_Avg_Unit_Price.xls. You may export site inventory list (Inventory | Report | Site Inventory List) and morph into into the sample unit price file:
- The report of Site Inventory List should include three columns: Item, Site and Avg. Price().
- Export the report to an excel.
- Remove all columns excepting the 3 columns above.
- Rename the three columns as below:
- Item to Item No. (in_no)
- Site to Site (site)
- Avg. price() to Unit cost () (unit_cost_c)
- Here is the updated excel file that you can copy column names from.
Step 7. Vendor Prices
Vendor prices setup include vendors, vendor authorization for sites, and items supplied by vendors. See the blog Vendor Setup for more information. Vendor and part prices can be uploaded from excel files - see this blog.
Additional Resources
- Vendor Setup
- Bulk data update via export and import
- Data Upload Part 2: Asset and Location
- Data Upload Part 3: Preventive Maintenance
- Data Upload Part 4: Vendor and Part Prices
- User Guide and Admin Guide (customer account required)
- Calem Enterprise Training Site
- Calem Enterprise Blogs
- Calem Enterprise demo
By accepting you will be accessing a service provided by a third-party external to https://eam.calemeam.com/


