Calem Blogs
Multiple-Cloud Service Migration
Instance export and import can be used to extract instance data from one instance and upload to another instance. This is an exciting feature in R10r. It enables organizations to expand their use of CalemEAM and focus on their business needs without being boggled down by enormous investment of time and money in data integration.
Business Case 1
The first business case deals with setting up new instances based on existing instances. It is covered in this blog.
- A business unit has implemented Calem Cloud service and uses the cloud service to manage its daily operations. The organization likes the results and decides to implement Calem Cloud Services for other business units.
- The business units operate independently and do not wish to share the same cloud service. However, the business units like to have the customization and configuration of the existing Calem Cloud service.
- This business case can be realized by instance export of common data from the existing instance and upload to new instances.
Business Case 2
The second business case deals with splitting an existing instance into multiple instances. It is covered in this blog.
- An organization uses Calem Enterprise to manage its global maintenance operations including manufacturing plants and customer installations. The organization decides to use a separate Calem Cloud Service to manage manufacturing plants. The plants data needs to be extracted from the global Calem Enterprise service and migrated to the new cloud service.
-
- This business case can be realized by instance export of the data of the manufacturing sites from the existing instance and upload to the new instance.
Instance export is launched from Integration module of your source cloud service.
- Menu path: Integration module | Open | Instance Export
- First of all, back up your system:
- Export database
- Backup your Calem installation directory which includes metadata, customization and documents.
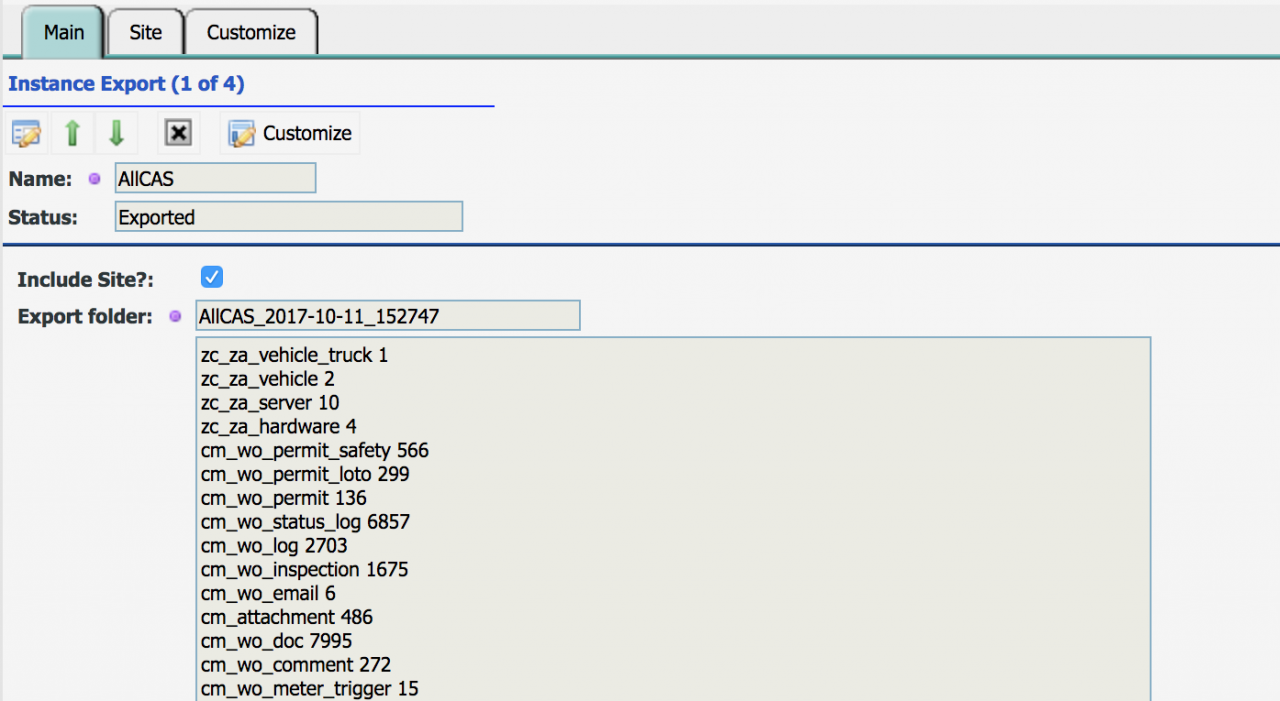
- Create a new instance export entry to start the instance export
- For business case 1, do not add sites. So, only common data is exported.
- For business case 2, add sites to be exported. Both site data and common data are exported.
- It takes a while to export an instance.
- After export is successful, the export entry includes objects and number of records exported.
- Instance export is stored at Calem_Home/server/upload_files/instance/export/yourExportName_yyyy-mm-dd_hhmmss
Step 2. Instance Import
The instance export directory may be zipped up, transported to the destination cloud service, and unzipped at the instance import directory at Calem_Home/server/upload_files/instance/import/yourExportName_yyyy-mm-dd_hhmmss.
Next, launch the instance import process from your destination cloud service:
- Menu path: Integration module | Open | Instance Import
- First of all, back up your system:
- Export database
- Backup your Calem installation directory which includes metadata, customization and documents.
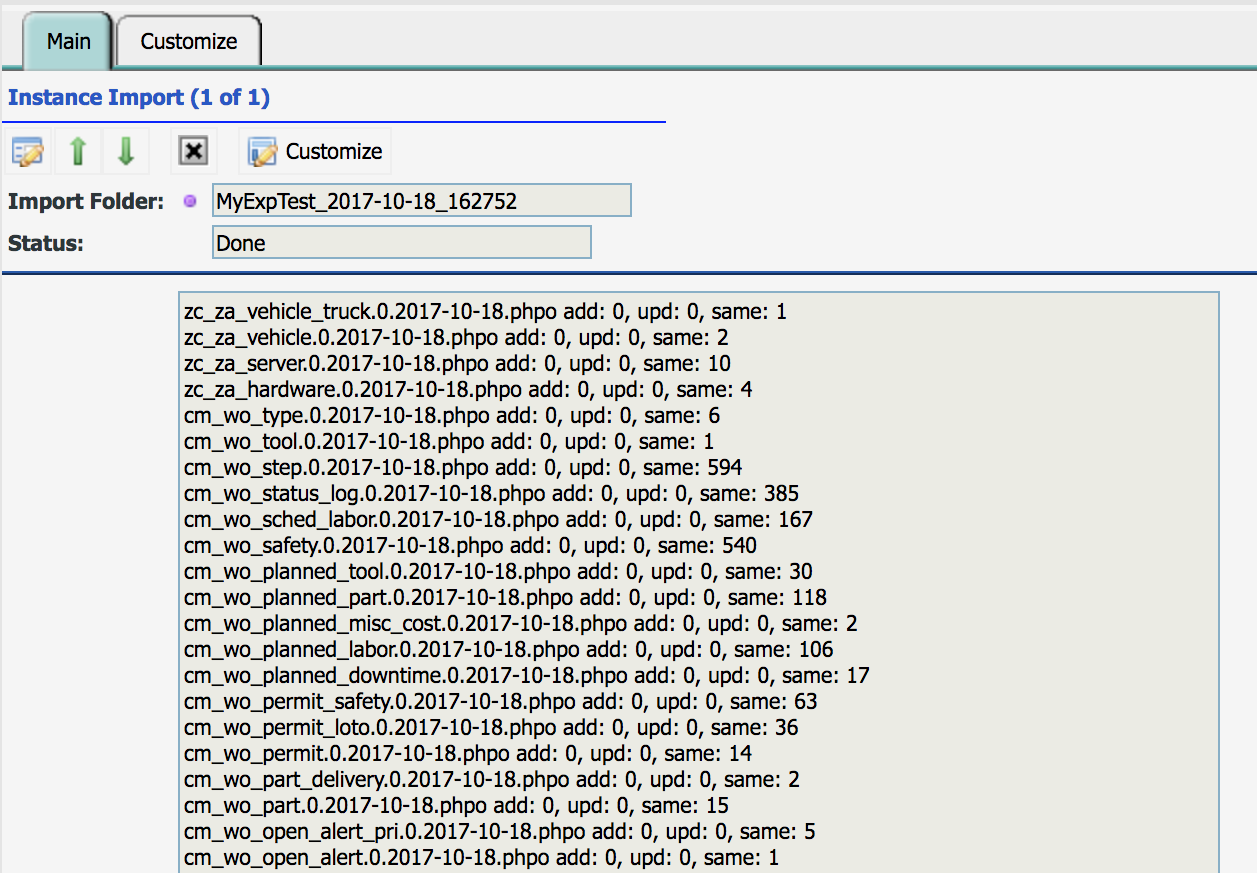
- Browse to pick your export file directory (Calem_Home/server/upload_files/instance/import/yourExportName_yyyy-mm-dd_hhmmss).
- Click save to start the import
- The import process will take a while
Step 3. Instance Export Purge
Instance export purge is applicable to business case 2 above. The site data has been migrated to the new cloud service. It can then be purged from the source cloud service.
- First of all, back up your system:
- Export database
- Backup your Calem installation directory which includes metadata, customization and documents.
- Have a written plan in place to restore the database and Calem installation directory in case of purge failure. Exercise the plan in the test instance so it is proven.
- The purge operation should
be planned and performed at a time window without user activities.
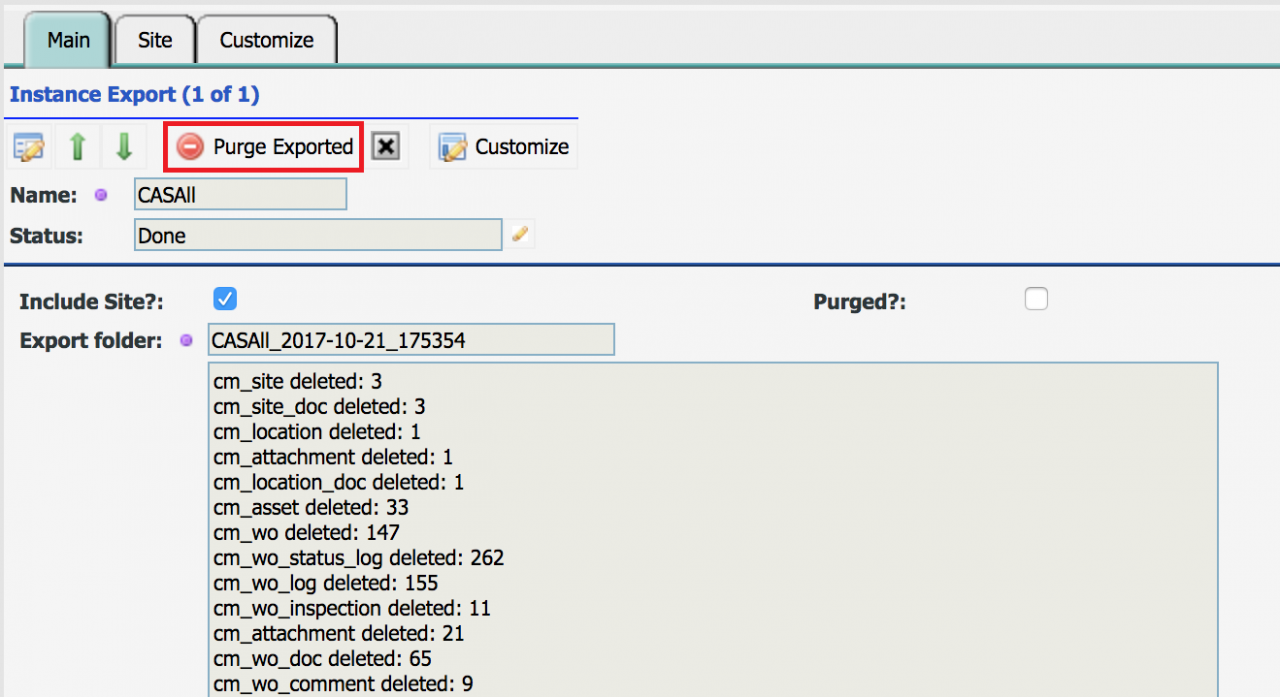
- A menu to remove exported data from instance export screen is available after export is successful
- Menu path: Integration module | Open | Instance Export | Open an export entry | Purge Exported
- Only site data is purged.
- Common data such as PM Plans, Asset groups, and meter groups are not purged.
- Attachments are purged
- Documents are not purged
- You should purge the exported data only after it is successfully imported to your destination cloud service.
- The purged flag is checked in the export entry if purge is successful. The export status is set to "Done".
Additional resources
- User Guide and Admin Guide (customer account required)
- See "28.6.2 Instance Data" of User Guide for detailed discussion of common and site data.
- Calem Enterprise Training Site
- Calem Enterprise Blogs
- Calem Enterprise demo
By accepting you will be accessing a service provided by a third-party external to https://eam.calemeam.com/


